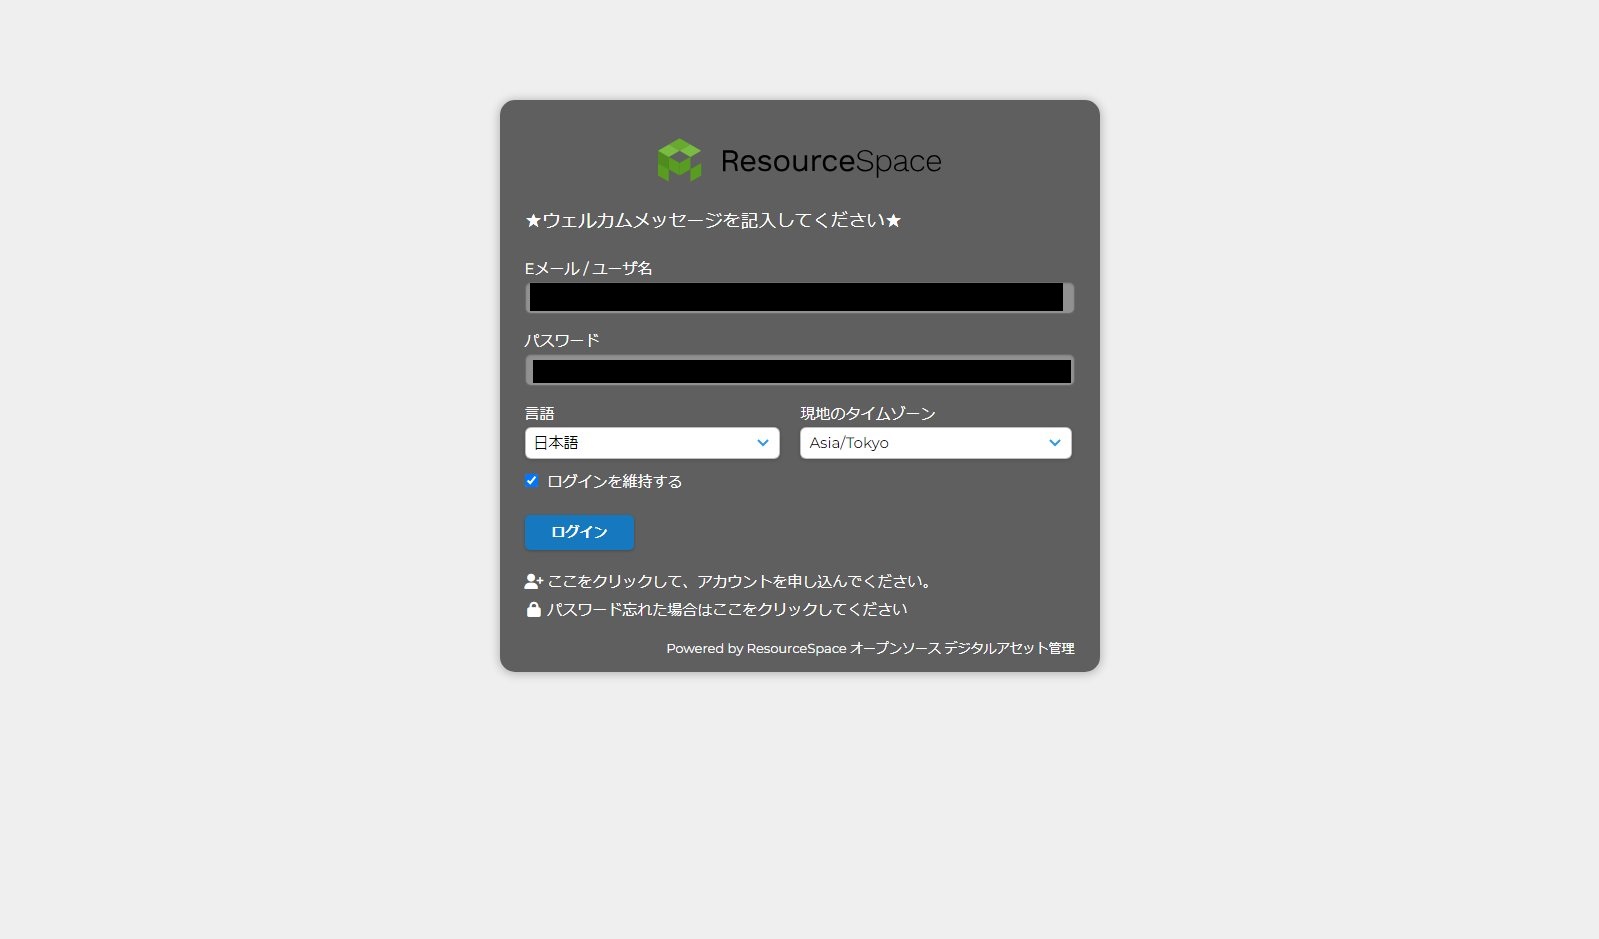
経緯
前記事 で Ubuntu 上に LAMP 環境を作り終えてベースを整えたので、今回は実際に Resource space をインストールして動かしてみます。
手順
phpMyAdmin で DB 作成
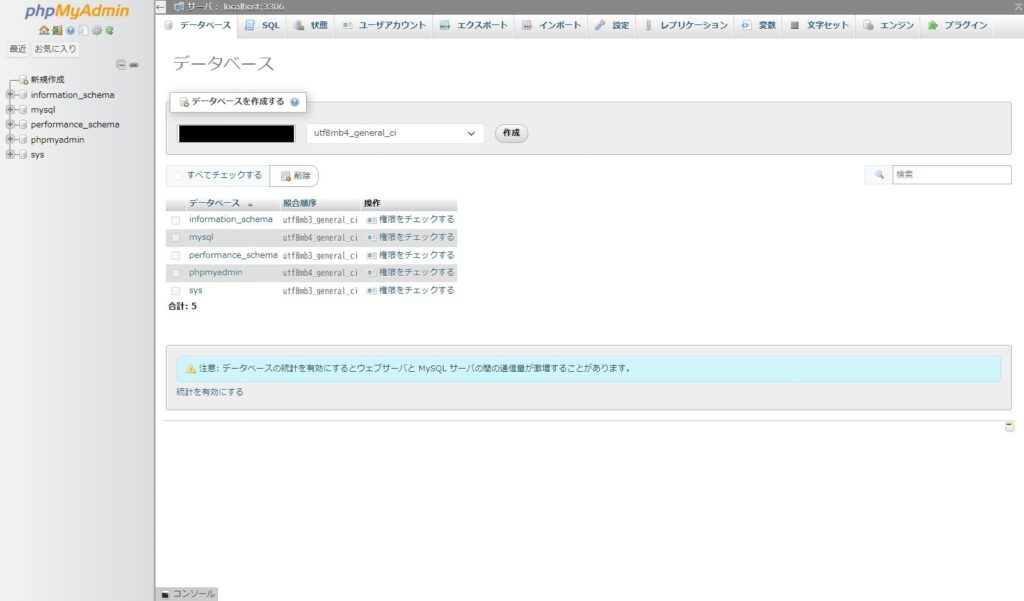
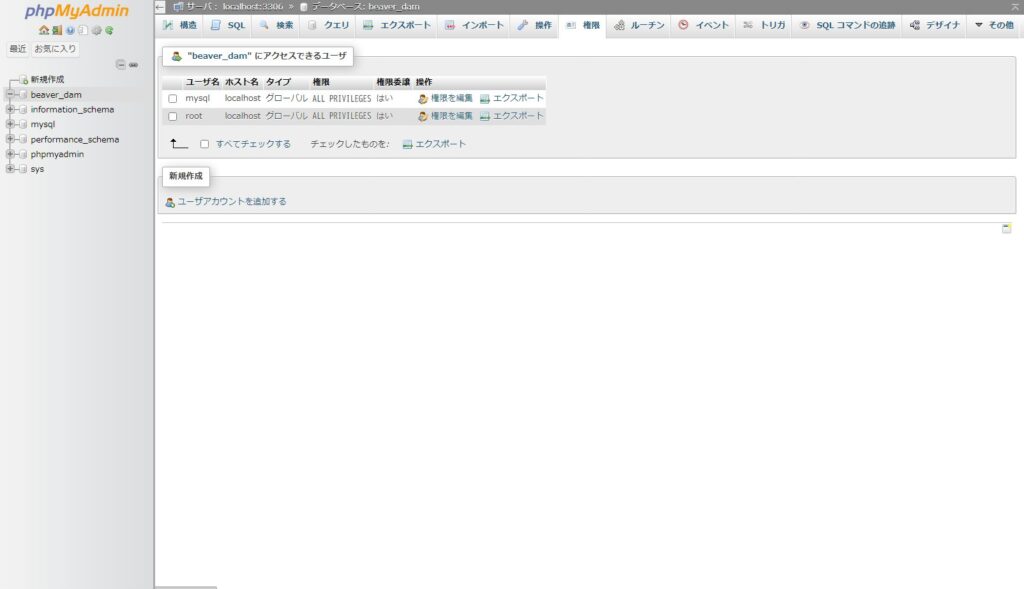
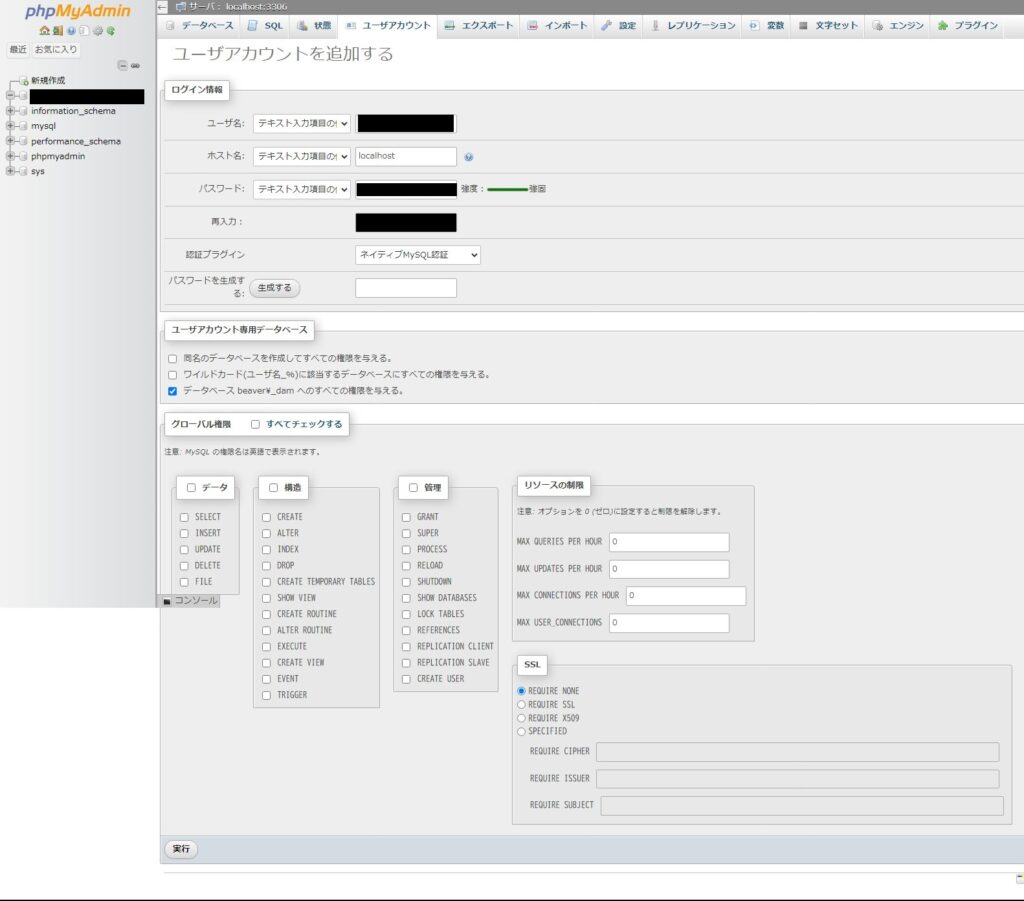
早速 Resource Space で使用するDBやユーザを設定していきます。
DB の箱を作成して、その箱に対してユーザ作成・DBに対する全権限付与で専用ユーザとします。
必要なパッケージのインストール
次に Resource Space に必要なパッケージをインストールしていきます。
# apt install -y ghostscript antiword postfix libimage-exiftool-perl cron wget inkscape git
パッケージリストを読み込んでいます... 完了
依存関係ツリーを作成しています... 完了
状態情報を読み取っています... 完了
ghostscript はすでに最新バージョン (10.02.1~dfsg1-0ubuntu7.4) です。
ghostscript は手動でインストールしたと設定されました。
cron はすでに最新バージョン (3.0pl1-184ubuntu2) です。
cron は手動でインストールしたと設定されました。
wget はすでに最新バージョン (1.21.4-1ubuntu4.1) です。
wget は手動でインストールしたと設定されました。
以下の追加パッケージがインストールされます:

## 略

取得:51 http://jp.archive.ubuntu.com/ubuntu noble/universe amd64 python3-scour all 0.38.2-4.1 [48.7 kB]
取得:52 http://jp.archive.ubuntu.com/ubuntu noble/main amd64 python3-cssselect all 1.2.0-2 [18.5 kB]
48.4 MB を 4秒 で取得しました (11.4 MB/s)
パッケージからテンプレートを展開しています: 100%
パッケージを事前設定しています ...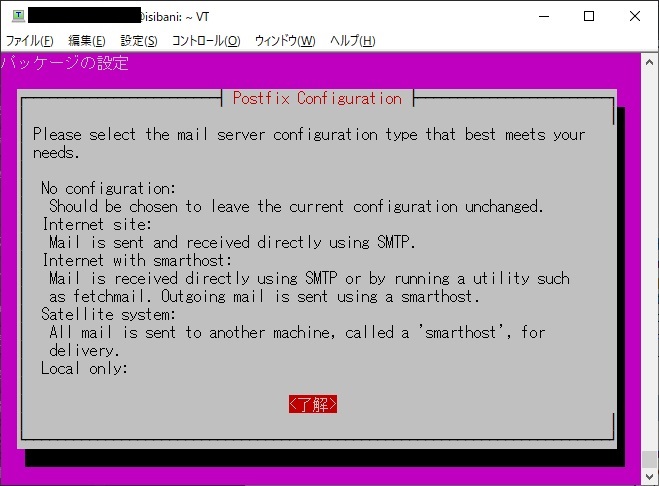
Postfix の設定画面。 phpMyAdmin と同様に対話式の設定画面が途中に挟まるので設定します。
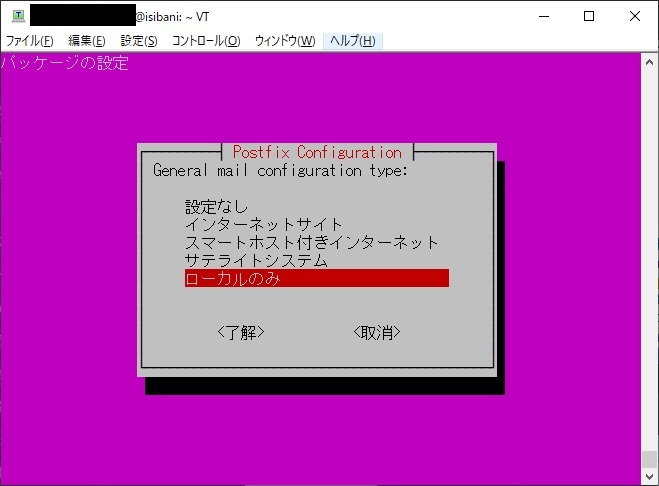
特にメールを送信する想定はないのでローカルのみに設定します。
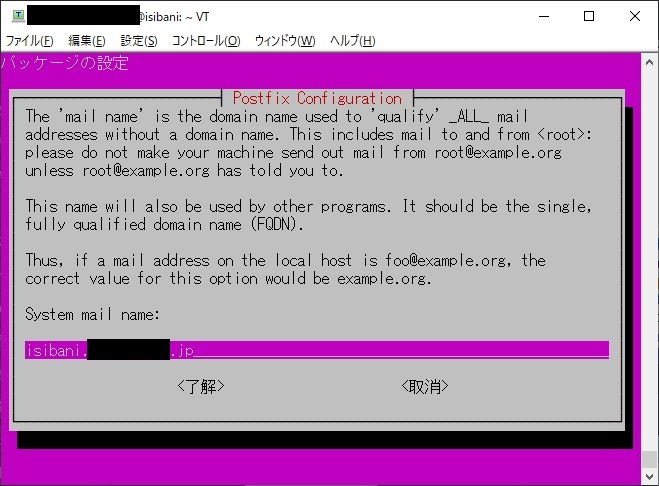
ホスト名を指定します。今回はローカルのホスト名で。
取得:43 http://jp.archive.ubuntu.com/ubuntu noble/universe amd64 libunicode-linebreak-perl amd64 0.0.20190101-1build7 [92.6 kB]

## 略

desktop-file-utils (0.27-2build1) のトリガを処理しています ...
hicolor-icon-theme (0.17-2) のトリガを処理しています ...
gnome-menus (3.36.0-1.1ubuntu3) のトリガを処理しています ...
libc-bin (2.39-0ubuntu8.3) のトリガを処理しています ...
rsyslog (8.2312.0-3ubuntu9) のトリガを処理しています ...
ufw (0.36.2-6) のトリガを処理しています ...
man-db (2.12.0-4build2) のトリガを処理しています ...
fontconfig (2.15.0-1.1ubuntu2) のトリガを処理しています ...
一通り入りました。OKです。
Apache で仮想サイトを切る
今回は画像処理系があるので ImageMagick (と PHPライブラリ の imagick) も入れておきます。
ただし、普通に apt でインストールすると古いバージョンが入ってしまうようなので今回は make install します。
The GD library (which is a minimum requirement) will provide automatic thumbnail previews for JPEG, GIF and PNG files. This can be enabled for many more image and video file formats by installing ImageMagick and FFmpeg, setting the paths to the binaries in config.php.v
公式ドキュメント的には必須要件ではなく推奨要件のような感じですが……(入れてから気付いた)。
まずは imagick の有無を確認するために phpinfo() を出力させたいので、 Apache の仮想サイトを切ります。
# mkdir /var/www/beaver/
# cp /etc/apache2/sites-available/000-default.conf /etc/apache2/sites-available/beaver.conf

# vi /etc/apache2/sites-available/beaver.conf
<VirtualHost *:80>
# DocumentRoot /var/www/html
ServerName screamingbeaver.example.jp
DocumentRoot /var/www/beaver
# ErrorLog ${APACHE_LOG_DIR}/error.log
# CustomLog ${APACHE_LOG_DIR}/access.log combined
ErrorLog ${APACHE_LOG_DIR}/error-berver.log
CustomLog ${APACHE_LOG_DIR}/access-berver.log combined仮想サイト用の conf ファイルを作成します。
# vi /var/www/beaver/index.php


<?php phpinfo();
phpinfo() を出力するファイルを index.php として仮想サイトのドキュメントルートに作成します。
# a2ensite beaver
Enabling site beaver.
To activate the new configuration, you need to run:
  systemctl reload apache2

# systemctl restart apache2
#
Apache を再起動。
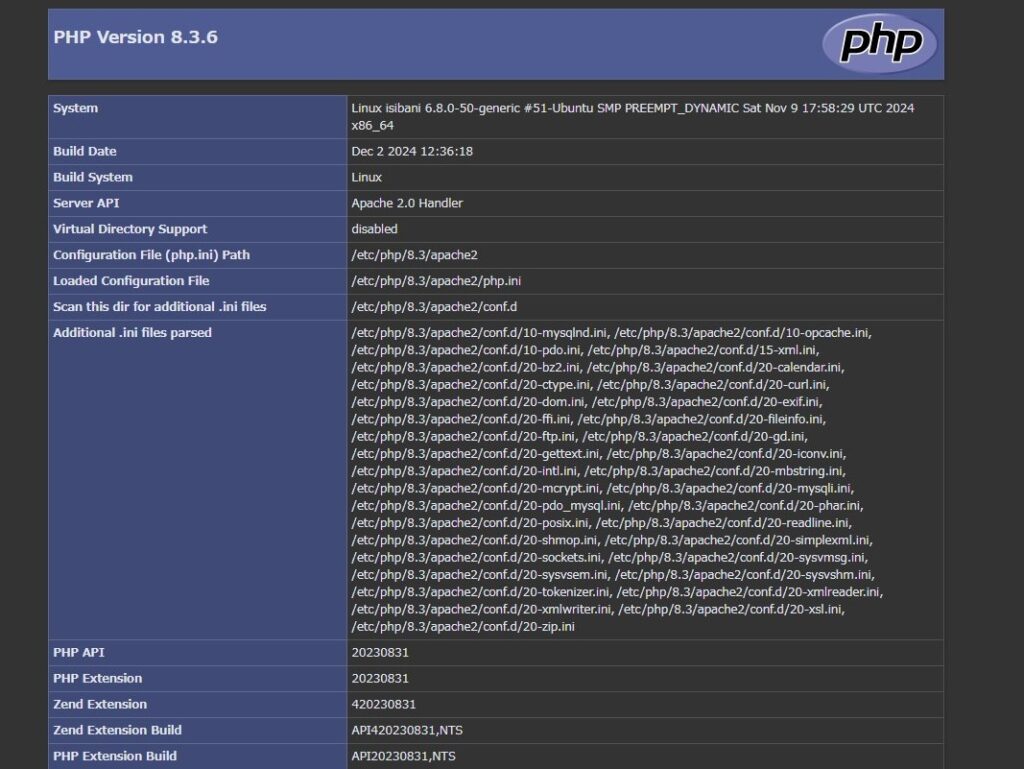
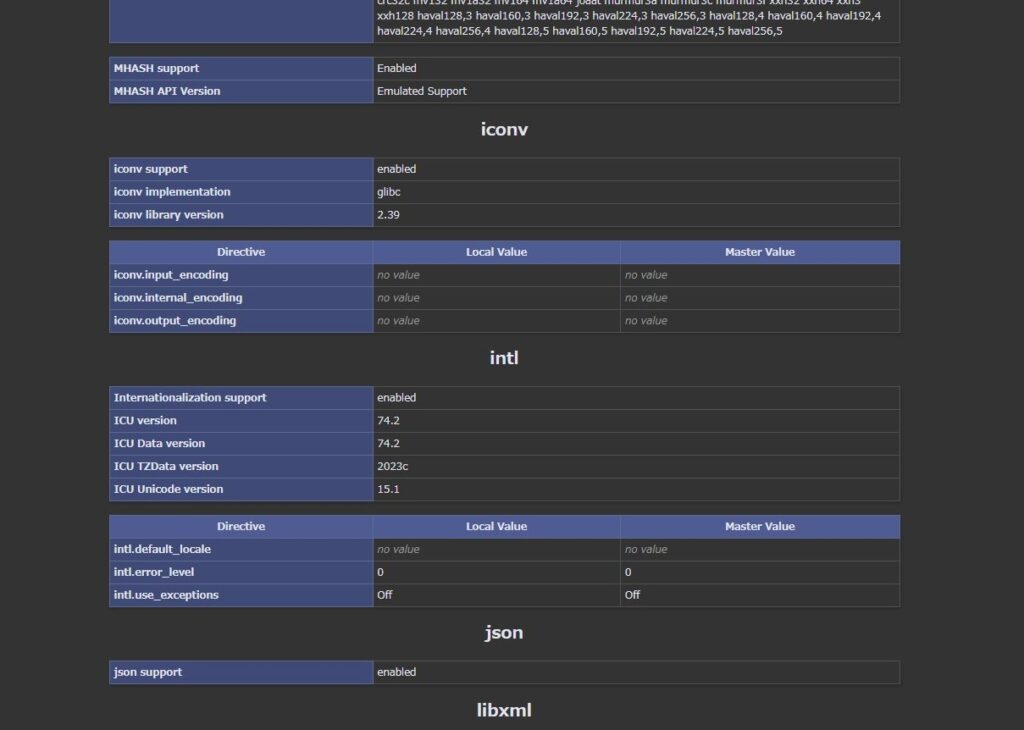
imagick はないですね。確認が取れました。
ImageMagick・imagick インストール
ということで、 ImageMagick を入れます。
# cd /opt
/opt# git clone https://github.com/ImageMagick/ImageMagick.git ImageMagick-7.1.1-41
Cloning into 'ImageMagick-7.1.1-41'...
remote: Enumerating objects: 173743, done.
remote: Counting objects: 100% (94/94), done.
remote: Compressing objects: 100% (51/51), done.
remote: Total 173743 (delta 53), reused 81 (delta 43), pack-reused 173649 (from 1)
Receiving objects: 100% (173743/173743), 156.14 MiB | 11.84 MiB/s, done.
Resolving deltas: 100% (147105/147105), done.
確認が取れたら、 Git で ImageMagick をリポジトリからクローンします。
/opt# cd ImageMagick-7.1.1-41
/opt/ImageMagick-7.1.1-41# ./configure
checking build system type... x86_64-pc-linux-gnu
checking host system type... x86_64-pc-linux-gnu

## 略

checking for gs PS writing device... ps2write
checking for gs EPS writing device... eps2write
-------------------------------------------------------------
Update ImageMagick configuration
checking that generated files are newer than configure... done
checking that generated files are newer than configure... done
configure: creating ./config.status

## 略

configure:
==============================================================================
ImageMagick 7.1.1-42 is configured as follows. Verify that this configuration
matches your expectations.

Host system type: x86_64-pc-linux-gnu
Build system type: x86_64-pc-linux-gnu

## 略

Options used to compile and link:
  PREFIX            = /usr/local
  EXEC-PREFIX       = /usr/local
  VERSION           = 7.1.1-42
  CC                = gcc
  CFLAGS            = -fopenmp -Wall -g -O2 -mtune=core2 -fexceptions -pthread -DMAGICKCORE_HDRI_ENABLE=1 -DMAGICKCORE_QUANTUM_DEPTH=16 -DMAGICKCORE_CHANNEL_MASK_DEPTH=32
  CPPFLAGS          = -DMAGICKCORE_HDRI_ENABLE=1 -DMAGICKCORE_QUANTUM_DEPTH=16 -DMAGICKCORE_CHANNEL_MASK_DEPTH=32
  PCFLAGS           =
  DEFS              = -DHAVE_CONFIG_H
  LDFLAGS           =
  LIBS              = -lm -lpthread -lgomp
  CXX               = g++
  CXXFLAGS          = -g -O2 -pthread
  FEATURES          = Channel-masks(32-bit) Cipher DPC HDRI OpenMP
  DELEGATES         = ps video
==============================================================================
make install するために configure します。ここまでは良さそうなので、 make します。
/opt/ImageMagick-7.1.1-41# make
make  all-am
make[1]: ディレクトリ '/opt/ImageMagick-7.1.1-41' に入ります

## 略

make[1]: ディレクトリ '/opt/ImageMagick-7.1.1-41' から出ます
OK。では、実際に make install しましょう。
/opt/ImageMagick-7.1.1-41# make install
make  install-am
make[1]: ディレクトリ '/opt/ImageMagick-7.1.1-41' に入ります
make[2]: ディレクトリ '/opt/ImageMagick-7.1.1-41' に入ります

## 略

 /usr/bin/install -c -m 644 MagickCore/ImageMagick.pc MagickCore/ImageMagick-7.Q16HDRI.pc MagickCore/MagickCore.pc MagickCore/MagickCore-7.Q16HDRI.pc MagickWand/MagickWand.pc MagickWand/MagickWand-7.Q16HDRI.pc Magick++/lib/Magick++.pc Magick++/lib/Magick++-7.Q16HDRI.pc '/usr/local/lib/pkgconfig'
make[2]: ディレクトリ '/opt/ImageMagick-7.1.1-41' から出ます
make[1]: ディレクトリ '/opt/ImageMagick-7.1.1-41' から出ます
完了したので、インストールできたか確認します。
/opt/ImageMagick-7.1.1-41# convert -version
convert: error while loading shared libraries: libMagickCore-7.Q16HDRI.so.10: cannot open shared object file: No such file or directory
怒られてしまいました……。
/opt/ImageMagick-7.1.1-41# ldconfig /usr/local/lib
/opt/ImageMagick-7.1.1-41#参考記事に則って ldconfig /usr/local/lib コマンドを実行。
/opt/ImageMagick-7.1.1-41# convert -version
WARNING: The convert command is deprecated in IMv7, use "magick" instead of "convert" or "magick convert"

Version: ImageMagick 7.1.1-42 (Beta) Q16-HDRI x86_64 8c781e209:20241116 https://imagemagick.org
Copyright: (C) 1999 ImageMagick Studio LLC
License: https://imagemagick.org/script/license.php
Features: Cipher DPC HDRI OpenMP(4.5)
Delegates (built-in):
Compiler: gcc (13.3)
OK、通るようになりました。
次に imagick です。
# cd /opt/
/opt#

/opt# git clone https://github.com/Imagick/imagick
Cloning into 'imagick'...
remote: Enumerating objects: 8579, done.
remote: Counting objects: 100% (943/943), done.
remote: Compressing objects: 100% (322/322), done.
remote: Total 8579 (delta 679), reused 786 (delta 620), pack-reused 7636 (from 1)
Receiving objects: 100% (8579/8579), 3.82 MiB | 10.29 MiB/s, done.
Resolving deltas: 100% (6022/6022), done.
同様にリポジトリから Git でクローンして。
# cd imagick
/opt/imagick# sudo phpize && sudo ./configure
Configuring for:

## 略

configure: patching config.h.in
configure: creating ./config.status
config.status: creating config.h
config.status: executing libtool commands
OKそうです。
/opt/imagick# sudo phpize && sudo ./configure
Configuring for:

## 略

libtool: finish: PATH="/usr/local/sbin:/usr/local/bin:/usr/sbin:/usr/bin:/sbin:/bin:/usr/games:/usr/local/games:/snap/bin:/sbin" ldconfig -n /opt/imagick/modules
----------------------------------------------------------------------
Libraries have been installed in:
   /opt/imagick/modules

If you ever happen to want to link against installed libraries
in a given directory, LIBDIR, you must either use libtool, and
specify the full pathname of the library, or use the '-LLIBDIR'
flag during linking and do at least one of the following:
   - add LIBDIR to the 'LD_LIBRARY_PATH' environment variable
     during execution
   - add LIBDIR to the 'LD_RUN_PATH' environment variable
     during linking
   - use the '-Wl,-rpath -Wl,LIBDIR' linker flag
   - have your system administrator add LIBDIR to '/etc/ld.so.conf'

See any operating system documentation about shared libraries for
more information, such as the ld(1) and ld.so(8) manual pages.
----------------------------------------------------------------------

Build complete.
Don't forget to run 'make test'.
通りました。次に make test 。
/opt/imagick# make test
/bin/bash /opt/imagick/libtool --tag=CC --mode=install cp ./imagick.la /opt/imagick/modules
libtool: install: cp ./.libs/imagick.so /opt/imagick/modules/imagick.so
libtool: install: cp ./.libs/imagick.lai /opt/imagick/modules/imagick.la
libtool: finish: PATH="/usr/local/sbin:/usr/local/bin:/usr/sbin:/usr/bin:/sbin:/bin:/usr/games:/usr/local/games:/snap/bin:/sbin" ldconfig -n /opt/imagick/modules
----------------------------------------------------------------------
Libraries have been installed in:
   /opt/imagick/modules

If you ever happen to want to link against installed libraries
in a given directory, LIBDIR, you must either use libtool, and
specify the full pathname of the library, or use the '-LLIBDIR'
flag during linking and do at least one of the following:
   - add LIBDIR to the 'LD_LIBRARY_PATH' environment variable
     during execution
   - add LIBDIR to the 'LD_RUN_PATH' environment variable
     during linking
   - use the '-Wl,-rpath -Wl,LIBDIR' linker flag
   - have your system administrator add LIBDIR to '/etc/ld.so.conf'

See any operating system documentation about shared libraries for
more information, such as the ld(1) and ld.so(8) manual pages.
----------------------------------------------------------------------

Build complete.
Don't forget to run 'make test'.


=====================================================================
PHP         : /usr/bin/php8.3
PHP_SAPI    : cli
PHP_VERSION : 8.3.6
ZEND_VERSION: 4.3.6
PHP_OS      : Linux - Linux isibani 6.8.0-50-generic #51-Ubuntu SMP PREEMPT_DYNAMIC Sat Nov  9 17:58:29 UTC 2024 x86_64
INI actual  : /opt/imagick/tmp-php.ini
More .INIs  :
CWD         : /opt/imagick
Extra dirs  :
VALGRIND    : Not used
=====================================================================
TIME START yyyy-mm-dd hh:ii:ss
=====================================================================

## 略

This report can be saved and used to open an issue on the bug tracker at
https://github.com/php/php-src/issues
This gives us a better understanding of PHP's behavior.
Do you want to save this report in a file? [Yn]: y
Report saved to: /opt/imagick/php_test_results_20241216_0805.txt
では、実際に make install します。
/opt/imagick# make install
Installing shared extensions:     /usr/lib/php/20230831/
Installing header files:          /usr/include/php/20230831/
/opt/imagick#
割とすんなり行けました。ただし、このままでは PHP から認識できていないのでパスを通します。
/opt/imagick# vi /etc/php/8.3/mods-available/imagick.ini
; configuration for php imagemagick module
; priority=20
extension=/opt/imagick/modules/imagick.so
ディレクトリ mods-available 内に imagick.ini として make install したライブラリへのパスを記述した設定ファイルを作成します。
# vi /etc/php/8.3/apache2/conf.d/20-imagick.ini

; configuration for php imagemagick module
; priority=20
extension=/opt/imagick/modules/imagick.so
もう一ヶ所、今回は PHP が Apacheモジュール版 なので Apache に関連する部分でもパスを設定しておきます。この ini ファイルがないと PHP が上手く認識してくれませんでした。
/opt/imagick# systemctl restart apache2
※比較のため再掲↑
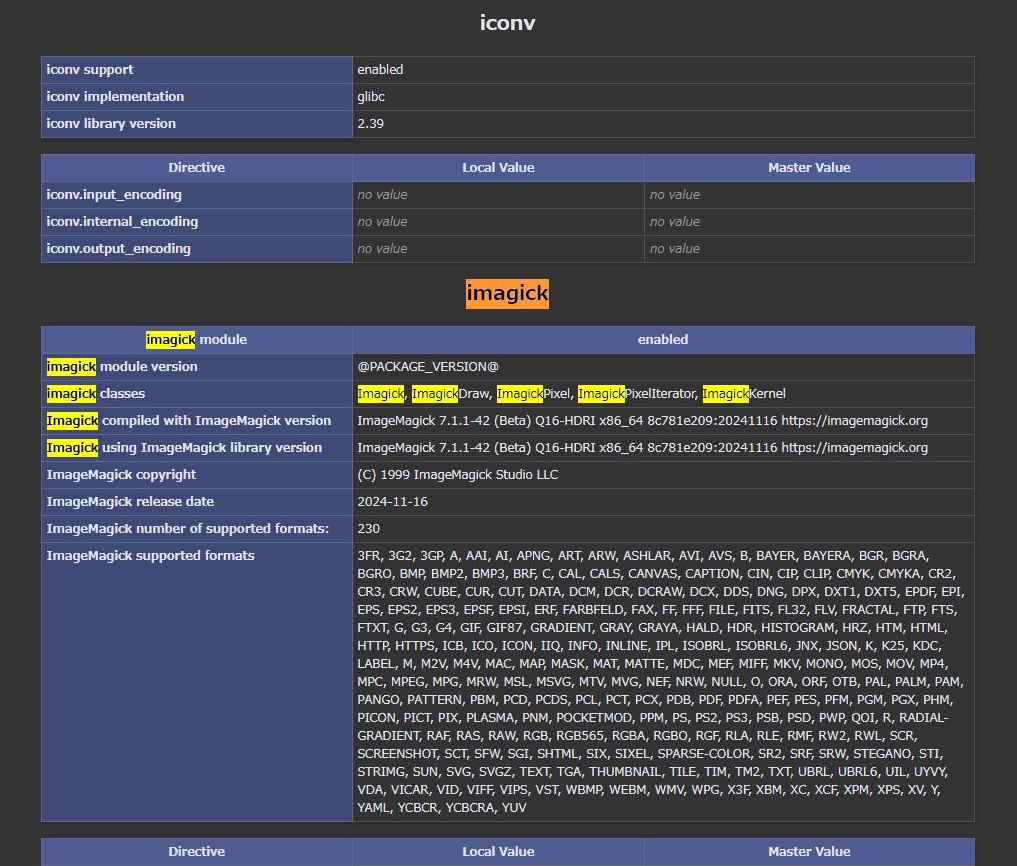
これで imagick が入りました。上が設定前。下が設定後。明らかに imagick の項目が増えていることが確認できます。
Resource Space インストール
これで本題、 Resource Space のインストールを実施します。
最初は git-svn を使おうとしましたが上手く行かなかったので結局 subversion をそのまま使いました。
# cd /var/www/beaver/

/var/www/beaver# apt install -y subversion
パッケージリストを読み込んでいます... 完了
依存関係ツリーを作成しています... 完了
状態情報を読み取っています... 完了
提案パッケージ:
  db5.3-util libapache2-mod-svn subversion-tools
以下のパッケージが新たにインストールされます:
  subversion

## 略

subversion (1.14.3-1build4) を展開しています...
subversion (1.14.3-1build4) を設定しています ...
man-db (2.12.0-4build2) のトリガを処理しています ...
まずは subversion インストール。
/var/www/beaver# svn co https://svn.resourcespace.com/svn/rs/releases/10.5 ./
A    css

## 略

A    manifest.json
A    iccprofiles/sRGB_IEC61966-2-1_black_scaled.icc
 U   .
リビジョン 25766 をチェックアウトしました。
クローン完了です。結構掛かりました。
ホスト名エラー
これでインストール画面 (仮想サイトとして設定した http://screamingbeaver.example.jp) にアクセスしようとしたところ、以下のエラーで起こられてしまいました。
Base URL does not seem to be correct (could not load license.txt).
Base URL
http://screamingbeaver.example.jp
……思い当たる節としては、今回とりあえずサーバを建てるだけということで名前解決をしていない(LAN内の DNS に登録していない)ので、ホスト名で参照しようとしても DNS に登録がないので自分自身すら見付けられない、ということの模様。
であれば。
# vi /etc/hosts

127.0.1.1       screamingbeaver.example.jp
hosts で自前で解決させれば良いだけ、ということでこれで解決しました。
PHP のメモリ上限やファイル処理の上限調整
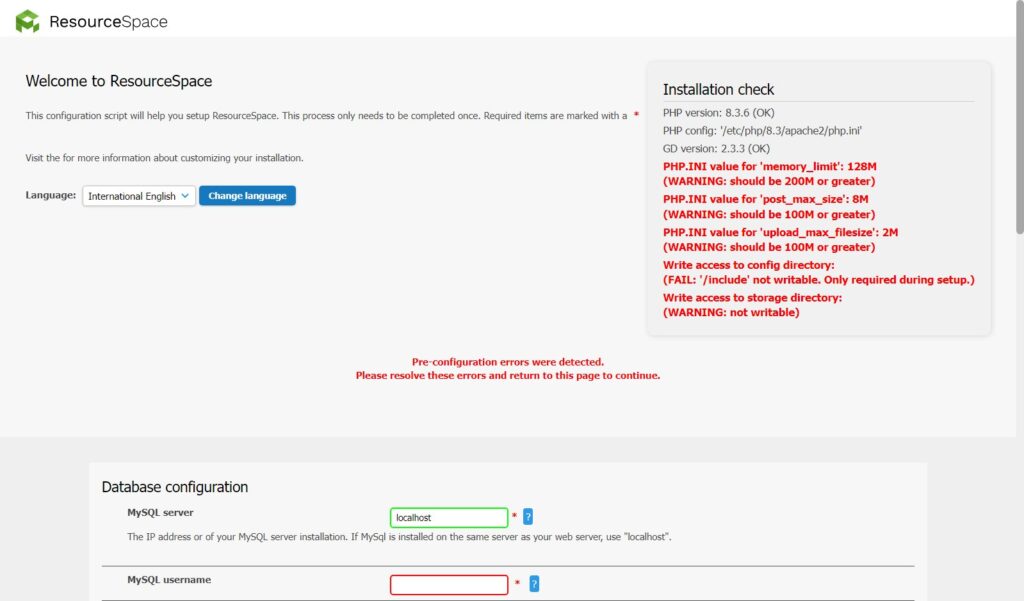
次にインストール画面で怒られたのは PHP のメモリ使用率や画像処理の制限。
# vi /etc/php/8.3/apache2/php.ini

;memory_limit = 128M
memory_limit = 512M


;post_max_size = 8M
post_max_size = 256M

;upload_max_filesize = 2M
upload_max_filesize = 256M
PHP のメモリ使用率や画像処理の制限を上げます。
# systemctl restart apache2Apache 再起動で設定再読み込み。
所有者・権限
/var/www/beaver# chown -R www-data:www-data ./
/var/www/beaver# ls -al
合計 192
drwxr-xr-x 20 www-data www-data  4096 mm月 dd hh:ii .
drwxr-xr-x  4 root     root      4096 mm月 dd hh:ii ..
drwxr-xr-x  4 www-data www-data  4096 mm月 dd hh:ii .svn
drwxr-xr-x  2 www-data www-data  4096 mm月 dd hh:ii .well-known
drwxr-xr-x  3 www-data www-data  4096 mm月 dd hh:ii api
drwxr-xr-x  3 www-data www-data  4096 mm月 dd hh:ii batch
-rw-r--r--  1 www-data www-data  1426 mm月 dd hh:ii composer.json
-rw-r--r--  1 www-data www-data 47913 mm月 dd hh:ii composer.lock
drwxr-xr-x  5 www-data www-data  4096 mm月 dd hh:ii css
drwxr-xr-x  2 www-data www-data 12288 mm月 dd hh:ii dbstruct
drwxr-xr-x  3 www-data www-data  4096 mm月 dd hh:ii documentation
drwxr-xr-x 10 www-data www-data  4096 mm月 dd hh:ii gfx
drwxr-xr-x  2 www-data www-data  4096 mm月 dd hh:ii iccprofiles
drwxr-xr-x  3 www-data www-data  4096 mm月 dd hh:ii include
-rwxr-xr-x  1 www-data www-data  2821 mm月 dd hh:ii index.php
drwxr-xr-x  2 www-data www-data  4096 mm月 dd hh:ii js
drwxr-xr-x  2 www-data www-data  4096 mm月 dd hh:ii languages
drwxr-xr-x 26 www-data www-data  4096 mm月 dd hh:ii lib
-rwxr-xr-x  1 www-data www-data    76 mm月 dd hh:ii license.txt
-rwxr-xr-x  1 www-data www-data 14751 mm月 dd hh:ii login.php
-rw-r--r--  1 www-data www-data  2398 mm月 dd hh:ii manifest.json
drwxr-xr-x  9 www-data www-data  4096 mm月 dd hh:ii pages
-rw-r--r--  1 www-data www-data  2437 mm月 dd hh:ii phpcs.xml.dist
-rw-r--r--  1 www-data www-data  7344 mm月 dd hh:ii phpstan-baseline.neon
-rw-r--r--  1 www-data www-data   757 mm月 dd hh:ii phpstan.neon.dist
drwxr-xr-x 66 www-data www-data  4096 mm月 dd hh:ii plugins
-rw-r--r--  1 www-data www-data  2116 mm月 dd hh:ii rector.php
-rwxr-xr-x  1 www-data www-data   323 mm月 dd hh:ii robots.txt
drwxr-xr-x  4 www-data www-data  4096 mm月 dd hh:ii templates
drwxr-xr-x  4 www-data www-data  4096 mm月 dd hh:ii tests
drwxr-xr-x  3 www-data www-data  4096 mm月 dd hh:ii upgrade
/var/www/beaver# ls -al ../
合計 16

drwxr-xr-x 20 www-data www-data 4096 mm月 dd hh:ii beaver
権限や所有者を変更します。
インストール
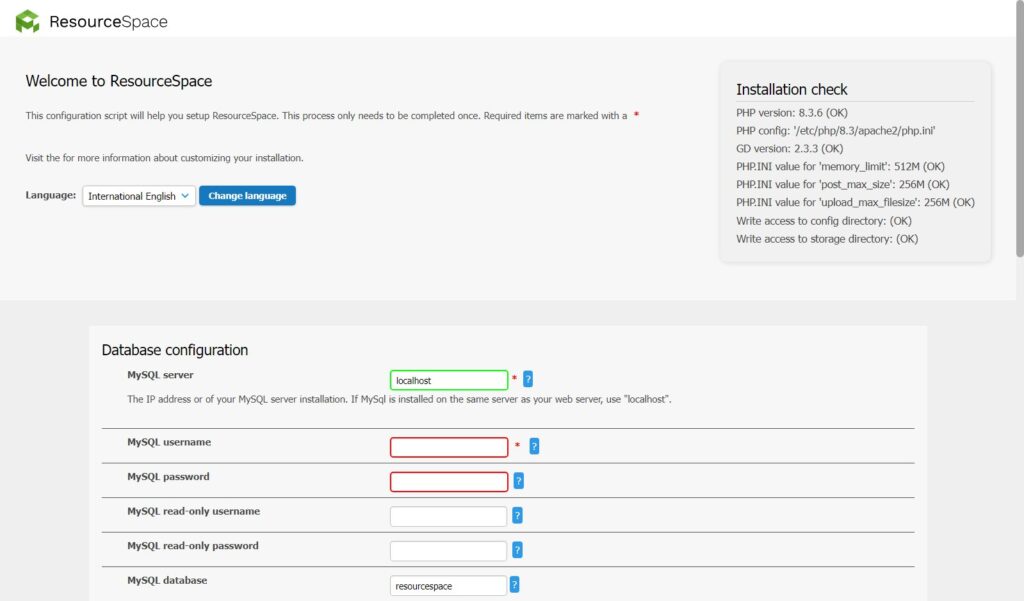
これでインストールできる状態になったので、冒頭でphpMyAdmin で設定したDBの名前等の設定値を入力していきます。
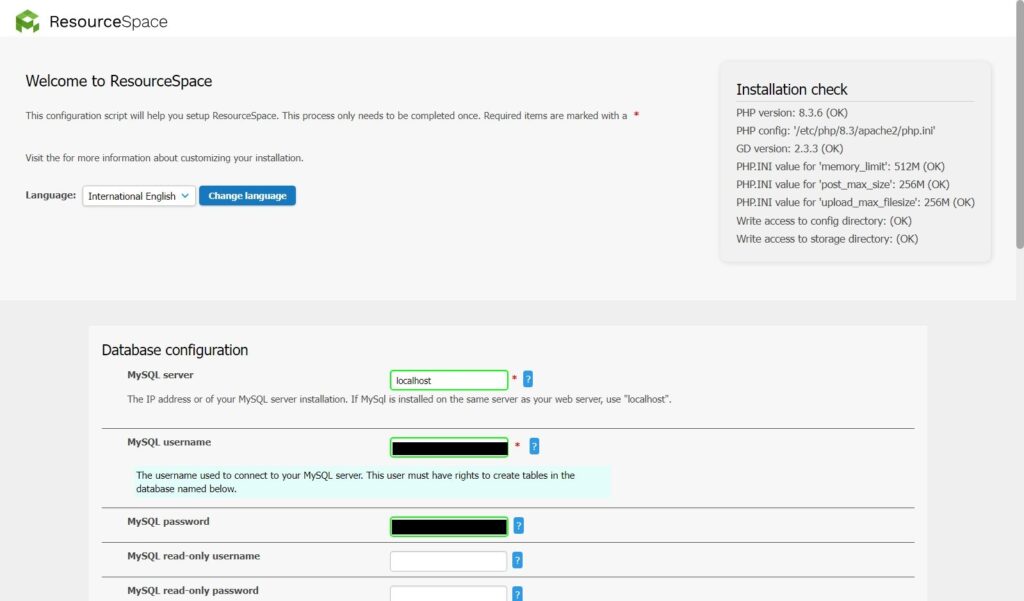
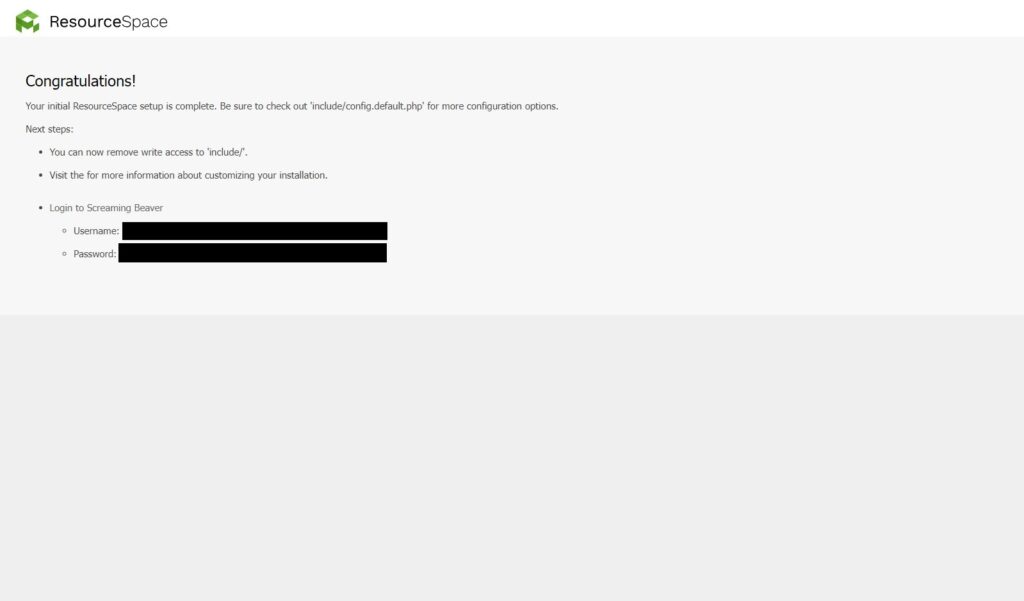
前回試したときもそうでしたが、平文でID・パスワードが表示されるので注意。
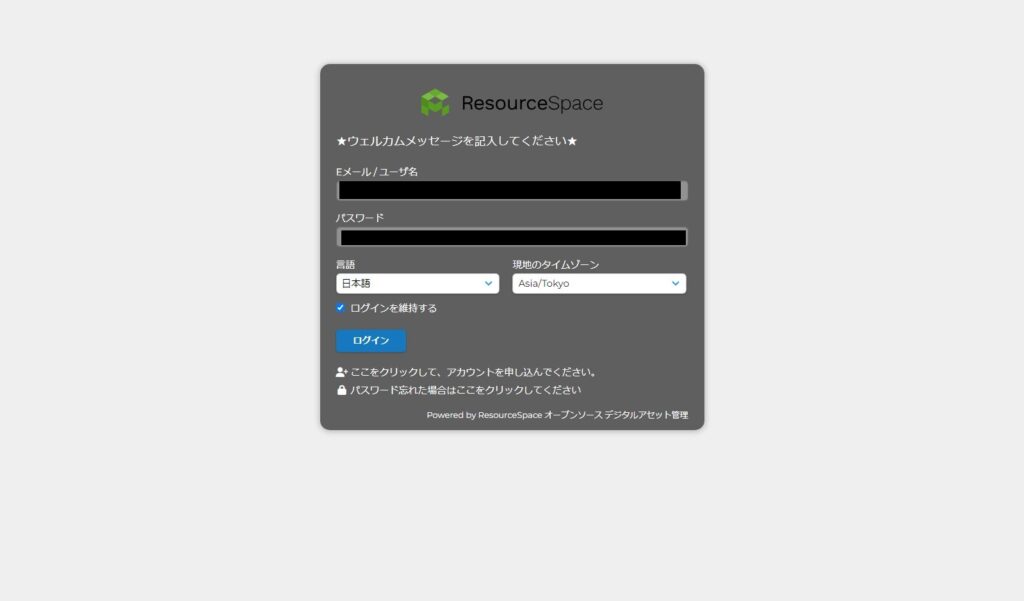
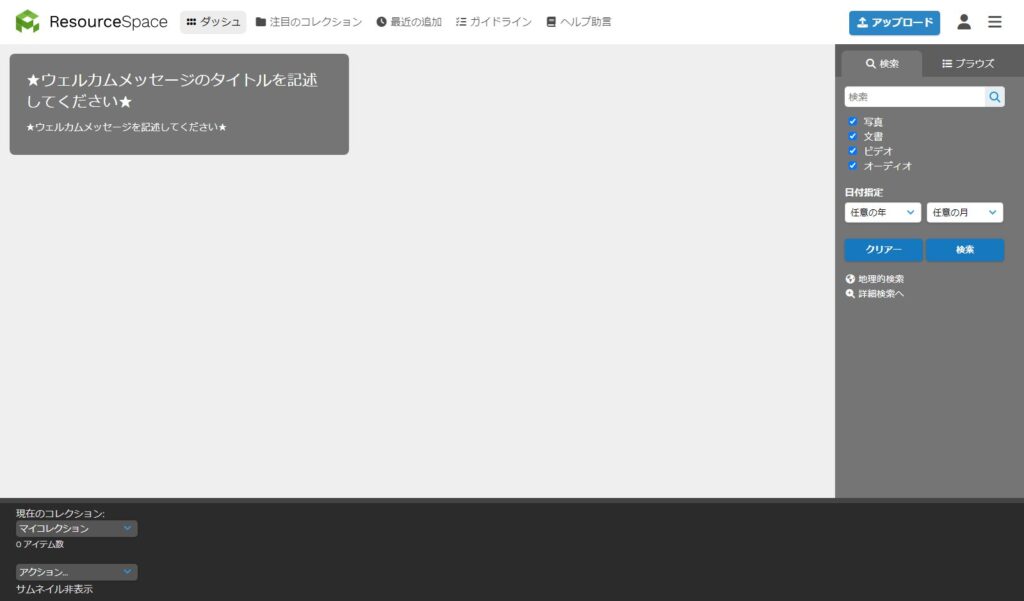
インストール画面で入力したID・パスワードを使ってログインします。
Apache のファイル一覧参照可能設定
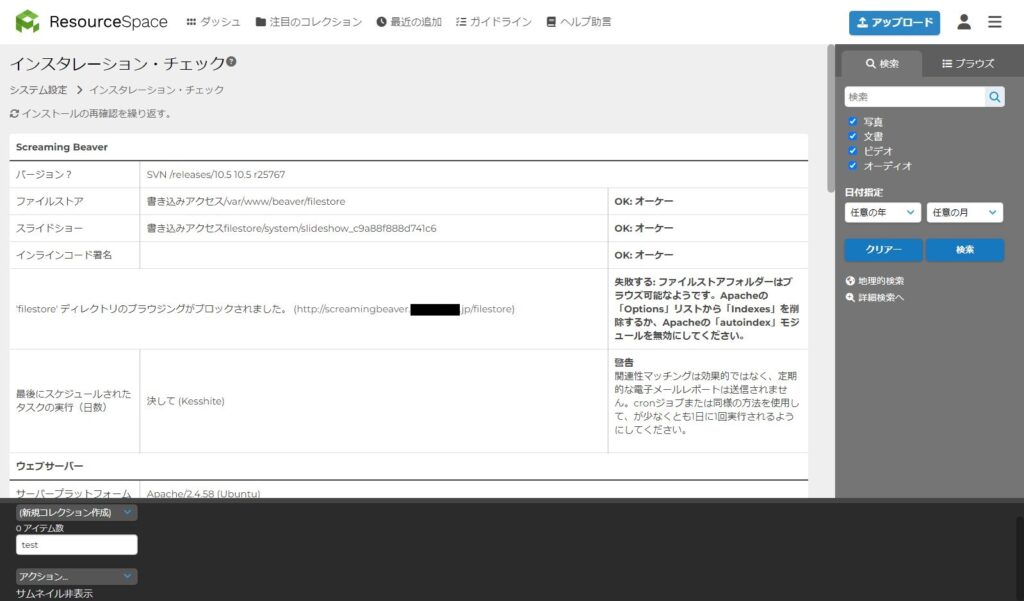
インストール後にインスタレーション・チェックを改めて確認すると Indexes が付いているとディレクトリ filestores が見えてしまう、と怒られていたので潰します。
# vi /etc/apache2/sites-available/beaver.conf <Directory "/var/www/beaver">
AllowOverride All
Options +FollowSymLinks -Indexes
DirectoryIndex index.php index.html
Require all granted
</Directory>こちらの記事を参考に。
# systemctl reload apache2設定をリロード。
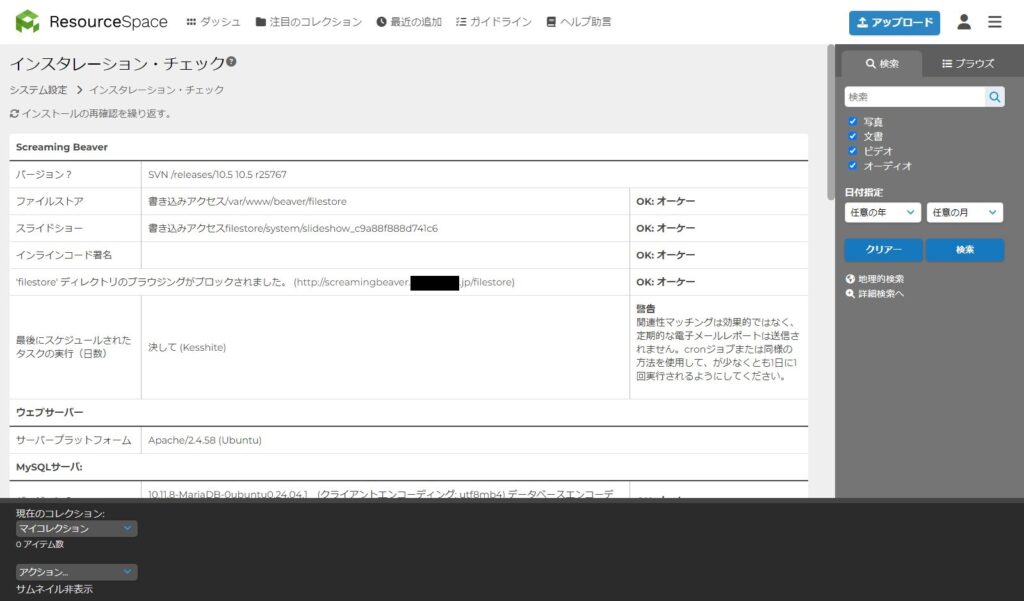
これでOK。
ここまでで一通りインストールとログインまでの挙動を確認できたので、環境構築としては完了です。後は試験的にいくつかリソースを入れてみて使用感を試してみます。
